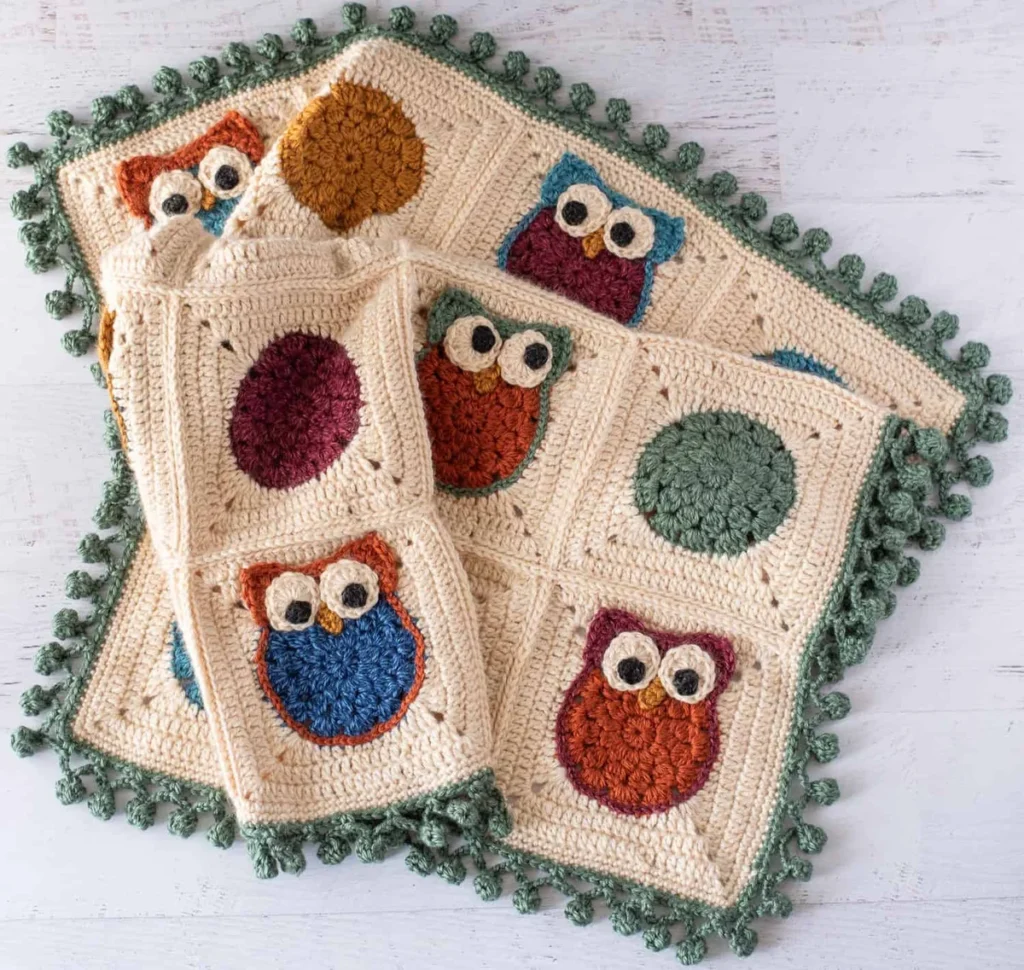
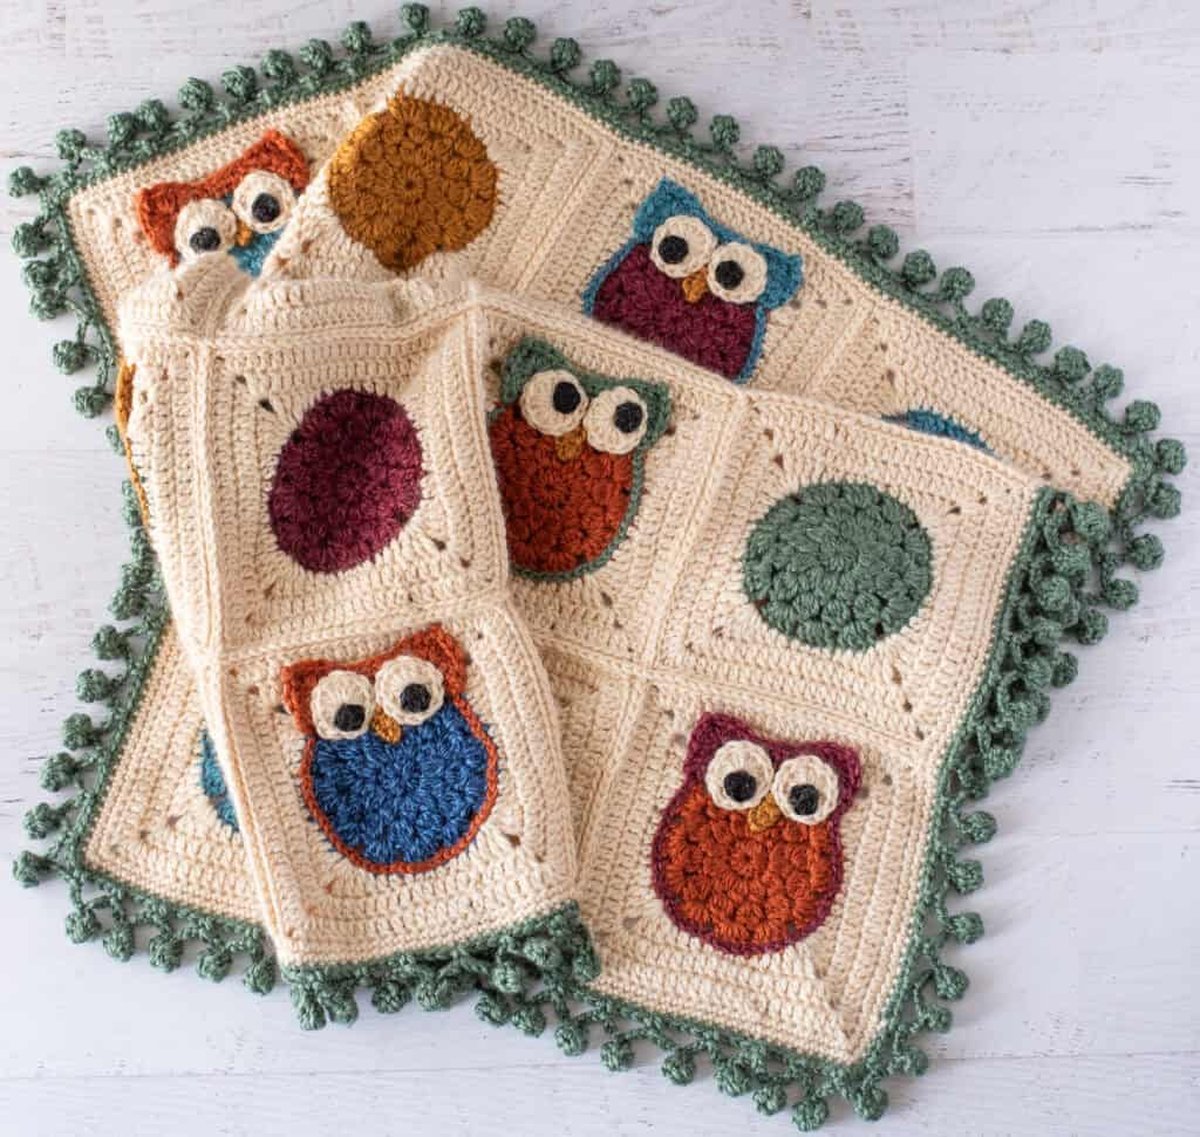
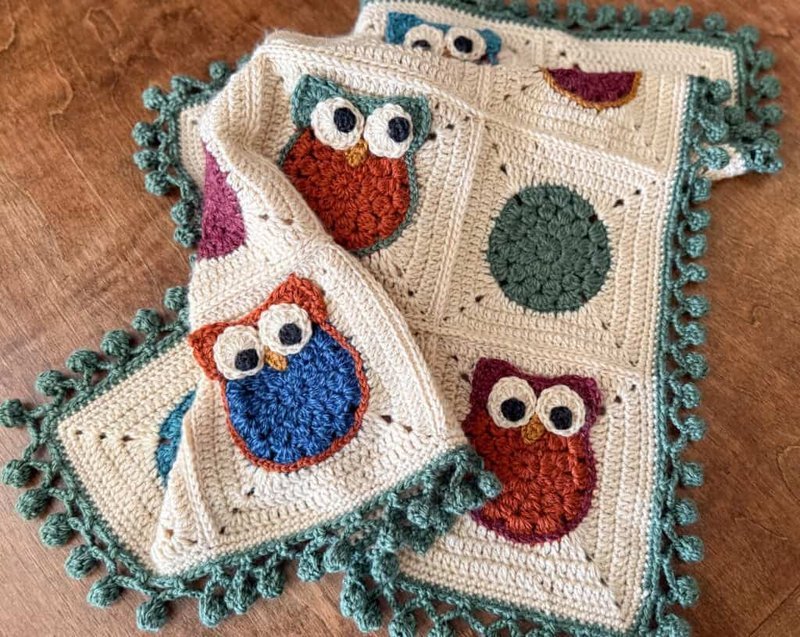
I’m standing at the foot of my niece’s baby crib, holding a blanket I crocheted myself, and I have to be honest: it took me a full minute before I could think of anything to say. It’s just a blanket. Except it isn’t. Every square has an owl face in it, the ears sit up proud, and there’s a border of little crochet poms that makes it look like it came out of a storybook. The baby, naturally, has claimed it as a teething toy. It’s fine. That’s what it’s for.
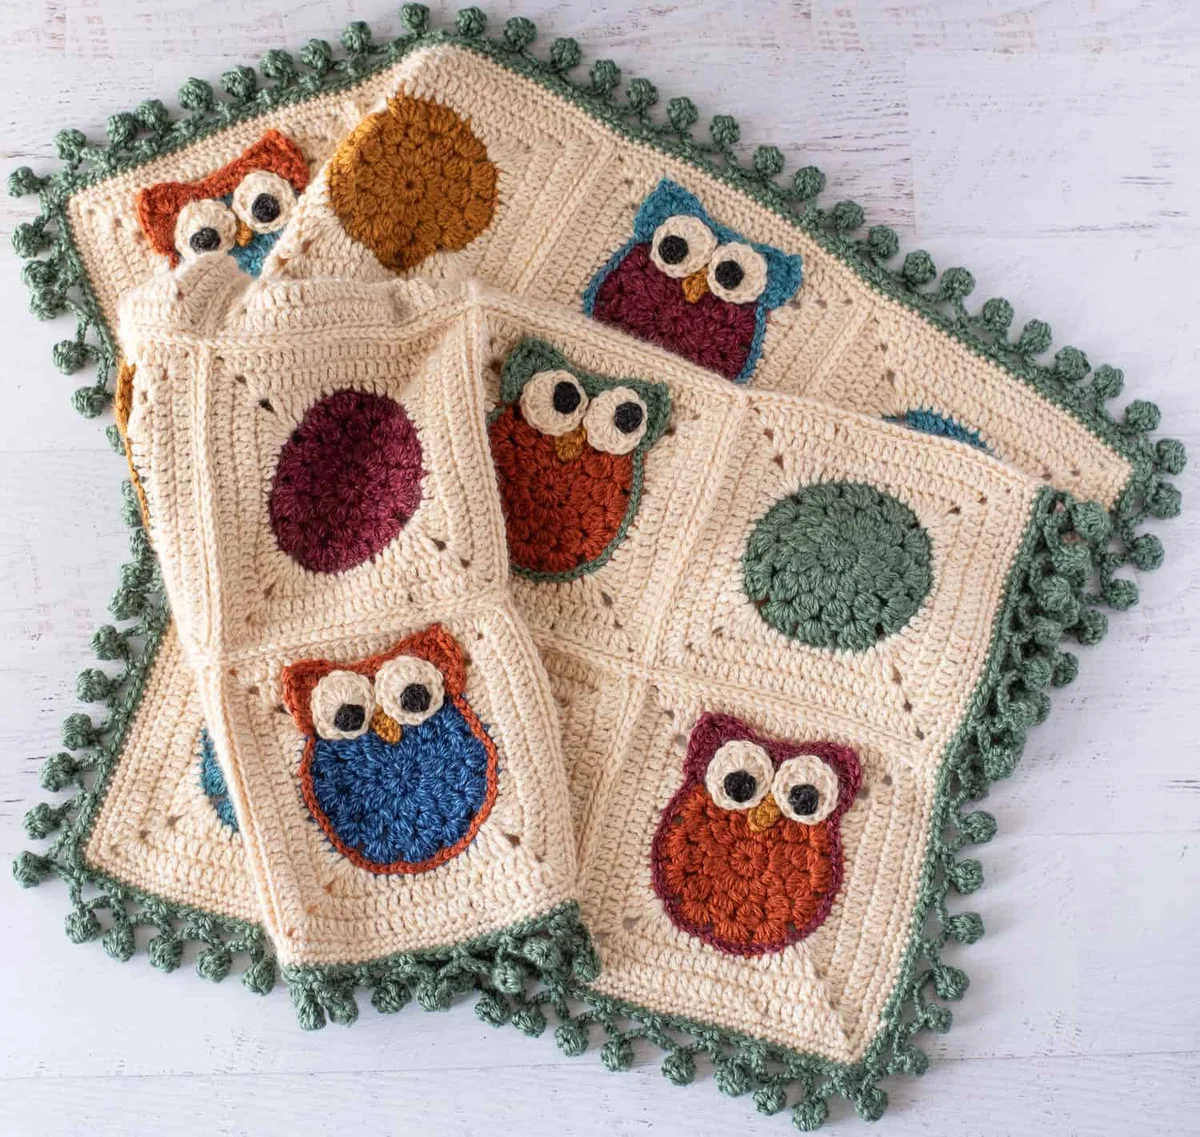
There’s a reason this pattern lives on my bucket list. A blanket that’s cozy and has personality is a rare thing. Most baby afghans end up as one solid color, or a row of stars, or a name stitched down the middle. This one makes you look down and find owls watching you back. I designed the layout so half the owls are looking at each other, which is a small detail, but it’s the kind of detail people notice every single time they see it.
Here’s the practical part: it’s a granny-style blanket made from 16 squares, finished at about 31 x 31 inches (79 x 79 cm) with the pom pom border. Each square is roughly 7 inches (18 cm) across. The whole thing works up in basic stitches, but two elements make it more than a beginner project, and I’ll walk you through both. First, the owl ears are crocheted directly into the final rounds of the square, so they don’t flop or unravel. Second, the border is a continuous crochet pom pom border, which sounds trickier than it is and is worth every loop.
Why the owls actually work
Most motif owls fail in the same two places. The ears get attached separately and sag within a week. And the body blends into the background because it’s the same color as everything else. This pattern sidesteps both problems.
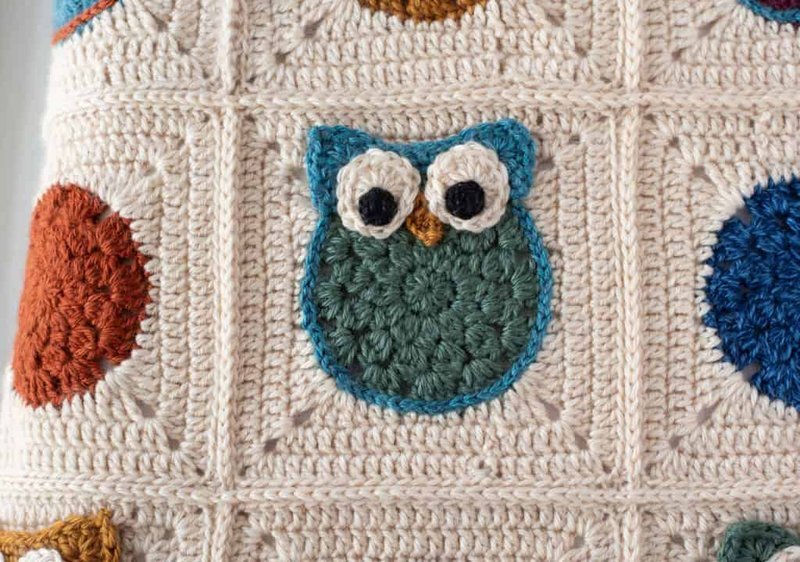
The ear tips are crocheted right into the final rounds of the granny square. No sewing on, no glue, nothing to come loose after a hundred washes. Then, before the eyes go on, a line of surface crochet in the ear color runs around the owl’s body. Same yarn as the ears, and it makes the whole owl pop off the square instead of dissolving into the background. I can’t tell you how much that one round changes the finished look.
And the poms. They’re not stuffed at all. Each one is worked as two crocheted halves that join back together into a ball, connected to the border with chain stitches so they’re anchored and won’t wander off. If you’ve never crocheted a pom border, this is the project where you finally try it.
Materials
I worked this in Lion Brand Heartland, a worsted weight (size 4) 100% acrylic yarn, about 251 yards (230 m) per 5 oz (142 g) skein. It’s on the lighter side of worsted, which suits this design. One warning from experience: this line has noticeable dye lot variation. Buy all your ivory and green at the start and check that the dye lot numbers match. I had the best luck buying multi-skein packs, where matching is basically guaranteed.
- 4 skeins Acadia (Ivory)
- 2 skeins Rocky Mountains (Green)
- 1 skein each: Badlands (Red), Yosemite (Orange), Bryce Canyon (Gold), Glacier Bay (Med Blue), Olympic (Dark Blue)
- A small amount of Black Canyon (Black) for the pupils
- US G+/4.50 mm crochet hook
- Stitch markers, tapestry needle, scissors
Gauge: 8 double crochets to 2 inches, or an inner circle of 4.25 inches across. If you crochet US and UK terms differently, keep a conversion chart open while you work.
Abbreviations and special stitches
Standard abbreviations apply: dc (double crochet), hdc (half double crochet), sc (single crochet), sl st (slip stitch), tr (treble crochet), ch (chain), st (stitch).
The motif rounds use cluster stitches, worked in one of three sizes. A 2dcc is a 2-double-crochet cluster: yarn over, insert hook, yarn over and pull up a loop, yarn over and pull through 2 loops; repeat once more in the same stitch, then yarn over and pull through all 3 loops. A 3dcc and 4dcc follow the same shape with 3 and 4 completed clusters (pulling through 4 and 5 loops respectively).
One more: the standing double crochet starts with a slip stitch on the hook, then you yarn over, insert the hook into the stitch, and work a double crochet as usual. It’s how the pattern begins a round without a joining chain.
The center motif (make 16)
Make a magic ring.
Round 1: Ch 1, work 12 hdc in the ring. Sl st to the first hdc to join. (12 st)
Round 2: Ch 2, (2dcc, ch 1) in the first stitch, (3dcc, ch 1) in each stitch around. Sl st to the top of the starting ch 2. (12 clusters)
Round 3: Sl st to the next ch 1 space. Ch 2, (3dcc, ch 2) in the same space, (4dcc, ch 2) in each remaining ch 1 space around. Sl st to the top of the starting ch 2. (12 clusters)
Round 4: Sl st to the next ch 2 space. Ch 3 (counts as a dc here and throughout). (3 dc, ch 1) in the same space, (4 dc, ch 1) in each remaining ch 2 space. Sl st to the top of the starting ch 3. (48 dc)
Fasten off, leaving a long tail for joining.
The regular squares (make 8)
Mark 4 corners with stitch markers. The corner spaces sit three groups of 4 dc apart from each other in round 4.
Round 5: The starting stitch is 2 stitches to the right of a corner. In ivory, work a standing dc in that stitch. *Tr in the next dc, (2 tr, ch 2, 2 tr) in the corner space, tr in the next stitch, dc in the next 2 stitches, hdc in the next stitch, skip the next space, hdc in the next stitch, sc in the next 2 stitches, hdc in the next stitch, skip the next space, hdc in the next stitch, dc in the next 2 stitches.* Repeat from * around, omitting the final dc in the last repeat. Join with a sl st to the top of the starting dc. (16 st per side)
Round 6: Ch 3. Work a dc in each stitch around. In each corner, work (2 dc, ch 2, 2 dc). Join to the top of the starting chain. (20 st per side)
Round 7: Ch 3. Work a dc in each stitch around. In each corner, work (2 dc, ch 2, 2 dc). Join to the top of the starting chain. (24 st per side) Fasten off and weave in ends.
The owl squares (make 8)
The ears and the body outline are worked in a contrasting color. The pairings I used, owl body to ear and outline color: red body with gold, red body with medium blue, orange body with red, orange body with green, green body with gold, green body with medium blue, medium blue body with orange, dark blue body with orange.
Mark the 4 corners as before, then mark the starting stitch, which is 1 stitch to the right of a corner.
The ears
Round 1 (front loops only): Join the ear color to the marked stitch. Sc in the same stitch, sc in the chain stitch. *Sc in the next 4 stitches, skip the next chain, repeat from * once, sc in the next 4 stitches, sc in the next chain, sc in the next stitch. Turn. (16 st)
From here the ears are worked in both loops, turning after each round.
Round 2: Ch 1, sc in the same stitch, hdc in the next 4 stitches, (hdc, sc) in the next stitch, sc in the next 3 stitches, (sc, hdc) in the next stitch, hdc in the next 4 stitches, sc in the next stitch, sl st to the last stitch. Turn. (18 st)
Round 3: No chain. Sl st in the next stitch, skip 2 stitches. In the next stitch work [3 dc, ch 2, sl st to the 2nd chain from hook (this makes the picot), 3 dc]. Skip 2 stitches, sl st in the next stitch (first ear complete). Sl st in the next 5 stitches, skip 2 stitches, then work the same [3 dc, ch 2, sl st to 2nd chain from hook, 3 dc] sequence in the next stitch. Skip 2 stitches, sl st in the next stitch. Fasten off and weave in ends.
Finishing the square
The next two rounds work around the original circle motif, the same shape as rounds 5 and 6 of the regular squares.
Round 5: Start 2 stitches to the right of a corner. In ivory, work a standing dc in the starting stitch. *Tr in the next dc, (2 tr, ch 2, 2 tr) in the corner space, tr in the next stitch, dc in the next 2 stitches, hdc in the next stitch, skip the next ch space, hdc in the next stitch, sc in the next 2 stitches, hdc in the next stitch, skip the next ch space, hdc in the next stitch, dc in the next 2 stitches.* Repeat around, omitting the final dc in the last repeat. Join with a sl st to the top of the starting dc. When you come to the ears, work in the back loops only. (16 st per side)
Round 6: Ch 3. Dc in each stitch around; (2 dc, ch 2, 2 dc) in each corner. Join to the top of the starting chain. (20 st per side)
Attaching the ear tips in round 7: this is the moment that decides whether the ears sit right. The tips line up with the 3rd dc from the corner of the previous round. Work the 2 dc after the corner, then yarn over as if to make a dc into the 3rd stitch. Grab 2 strands of yarn from the back of the ear tip, one on either side of the picot. Insert your hook into the 3rd stitch on the block, yarn over, and pull through both the stitch and the two strands. You’ll have 3 loops on the hook; finish the dc as usual.
Round 7: Ch 3. Dc in each stitch around; (2 dc, ch 2, 2 dc) in each corner, connecting the ear tips as described. Join to the top of the starting chain. (24 st per side)
Then, in the ear color, surface crochet around the color circle from ear to ear. If surface crochet is new to you, it’s a simple running stitch that sits on top of the fabric; a few practice stitches on a scrap before you commit to the square will save you a rip-back.
Eyes, pupils, and beaks
Eyes (make 16): In ivory, make a magic ring. Ch 3 (counts as the first dc), then 13 dc into the ring. Join invisibly, leaving a long tail.
Pupils (make 16): In black, make a magic ring. Ch 1, then 6 sc into the ring. Join invisibly, leaving a long tail.
Beaks (make 8): In gold, ch 5. Sl st in the 2nd chain from hook, sc in the next chain, hdc in the next chain, dc in the last chain. Fasten off with a long tail.
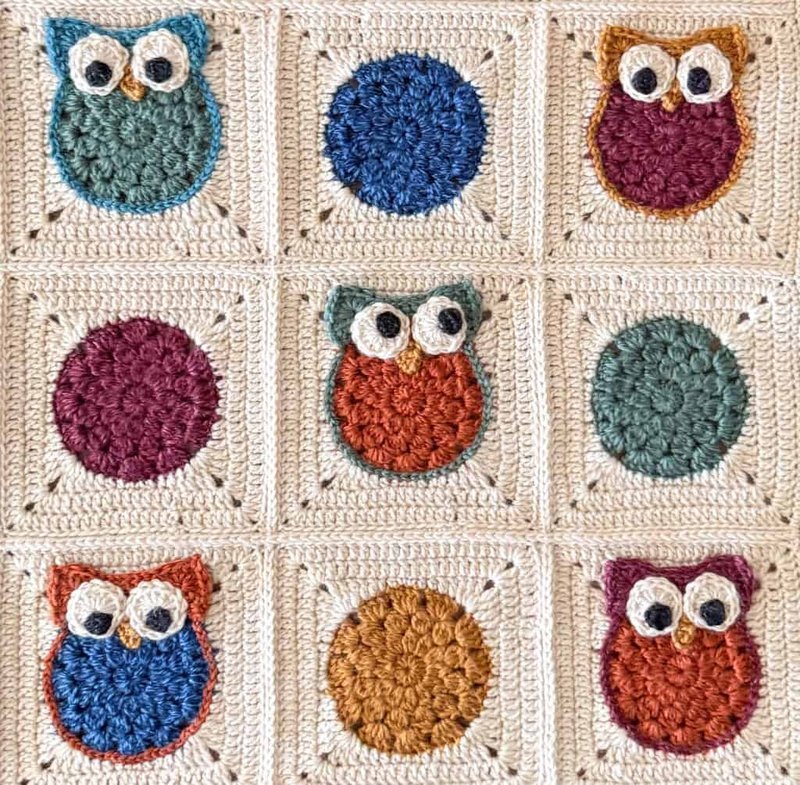
Sew the pupils to the lower part of each eye. Position the eyes and beak on the owl so the eyes overlap the top of the beak, then sew everything down. I arranged the pupils so neighboring owls look at each other, which means laying the finished squares out first and deciding each owl’s gaze before you sew anything. It’s the most fun part of the whole project, and it’s the detail people comment on.
Joining the squares
I used a modified slip stitch join, which lays completely flat. Start with a slip stitch on the hook, or attach yarn to the back loop of the corner of the first square. Insert the hook from front to back into the back loop of the first stitch on one square. Yarn over and pull through the stitch only, leaving 2 loops on the hook. Insert the hook from front to back into the corresponding stitch on the second square. Yarn over and pull through all loops at once. Repeat around. The finished seam lies flat between the squares, with the unworked front loops visible on either side. I attached 4 blocks into a row first, then joined the 4 rows.
The border, and the poms
The border is 4 rounds: three rounds of single crochet, then the pom pom border in the final round.
Round 1: In ivory, sl st into any stitch. Ch 1. Sc around the afghan, working a sc in the join between each square and 3 sc in each corner stitch. Join with a sl st to the top of the first sc.
Round 2: Ch 1. Sc around, with a sc in each stitch along the sides and 3 sc in each corner. Join with a sl st to the top of the first sc, changing to green yarn at the end.
Round 3: In green, ch 1. Sc around, with a sc in each stitch along the sides and 3 sc in each corner. Join with a sl st to the top of the first sc. Fasten off.
Pom pom border: mark a corner stitch. Counting that stitch as stitch 1, count to the 7th stitch to the right of it and attach green yarn with a sl st, ch 1, then sc in the same stitch to begin. Work each pom with 3 stitches skipped between poms. At a corner, space the skips so a pom lands exactly on the corner stitch; you may need to shift the skip count by one to keep the corner clean.
Finishing
Weave in every remaining end. I blocked the whole afghan after assembly: pinned it to a foam mat, misted it with water, and let it dry flat. You can block each square before sewing instead, or skip blocking entirely. Either way, the poms fluff up beautifully once everything dries.
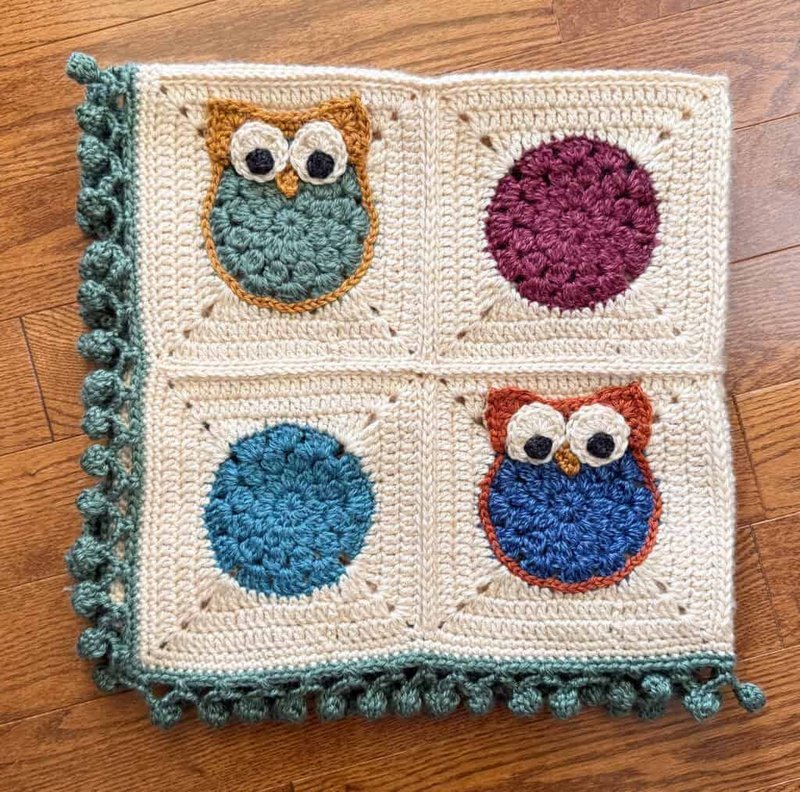
And that’s a baby-sized owl afghan, complete. My niece’s baby has slept on it, drooled on it, and tried to eat the poms, in that order. It has handled all three.
Making it bigger
The afghan scales easily. Crochet more squares, buy more ivory for the background and green for the border, and you’ll have plenty of the other colors left over for more owls. Play with the color placement until the owls sit well next to each other, and audition the pupil positions so they can look at one another. Straight-ahead pupils are a perfectly fine choice if you’d rather keep it simple.
Color combinations I used
| Color | Owl blocks | Regular blocks | Total |
|---|---|---|---|
| Red | 2 | 1 | 3 |
| Orange | 2 | 1 | 3 |
| Gold | 0 | 2 | 2 |
| Green | 2 | 1 | 3 |
| Medium blue | 1 | 2 | 3 |
| Dark blue | 1 | 1 | 2 |
I kept gold out of the owl blocks on purpose. Gold is the beak color, and using it for an owl body would have blurred the face. It’s a small logic call, but it keeps the whole grid readable from across the room.
Style Math
This is a handmade baby blanket, so the cost-per-wear math isn’t about your wardrobe. It’s about the gift. A blanket at this size, in a worsted acrylic with a full pattern behind it, is a gift that survives a first birthday. One skein of yarn is under $10 in most markets, and a blanket like this is the kind of thing that gets handed down. You’re not buying a $60 store blanket for one year of use; you’re crocheting one for three generations.
FAQ
Do I need to be an experienced crocheter?
The stitches are basic, but the ear attachment and the pom border take a little patience. If you can follow written rounds confidently, you’ll be fine. If you’re newer, practice the ear tip attachment and a single pom on a scrap first.
Can I use a different yarn?
Yes, as long as it’s a worsted weight and you hit the gauge of 8 dc to 2 inches. Just check dye lot consistency before you start, since the background uses a lot of one color.
Can I make it a lap blanket instead of baby size?
Add squares. More blocks means more ivory and green, and you’ll have the accent colors left over for extra owls. Re-lay the grid before seaming so the owls still face each other.
A note from Lena: I’ve bought a lot of ‘special occasion’ blankets over the years, and most of them end up in the back of the closet. This one is different, because the owls are doing something. They’re watching each other. It’s a small thing. It’s exactly the kind of small thing that makes a handmade gift feel like it came from a person, not a pattern sheet. I hope the owls in your version have somewhere to look too.
More along these lines: the free pattern is hosted on the original site, with an ad-free PDF version available for purchase if you want the clean layout while you work.